

How to deal with uneven glazed polished tile installation?
Oct 02, 2025
Leave a message
Uneven glazed polished tile installation can be a frustrating issue that not only affects the aesthetic appeal of a space but also poses potential safety hazards. As a leading supplier of glazed polished tiles, I understand the importance of a flawless installation. In this blog post, I'll share some effective strategies to deal with uneven glazed polished tile installation, ensuring your project turns out perfectly.
Understanding the Causes of Uneven Tile Installation
Before we dive into the solutions, it's crucial to understand the root causes of uneven tile installation. Some common factors include:
- Subfloor Issues: An uneven or unstable subfloor is one of the primary culprits. If the subfloor is not leveled properly, the tiles will not sit flat, resulting in an uneven surface.
- Improper Tile Spacing: Incorrect tile spacing can lead to unevenness. If the tiles are too close together or too far apart, it can cause the surface to appear bumpy.
- Poor Mortar Application: Inadequate or uneven mortar application can also cause tiles to be uneven. If the mortar is not spread evenly, the tiles may not adhere properly, leading to a wavy surface.
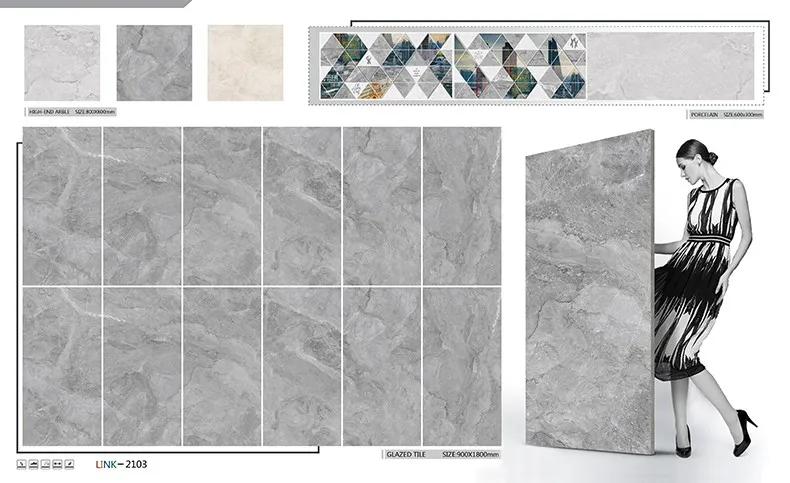
- Tile Quality: Low-quality tiles may have variations in thickness or flatness, which can contribute to uneven installation. As a supplier, I ensure that all our Black Ceramic Tile, Grey Luxury Glazed Ceramic Tiles, and Marble Porcelain Tiles meet the highest quality standards to minimize such issues.
Solutions for Uneven Glazed Polished Tile Installation
1. Level the Subfloor
The first step in addressing uneven tile installation is to ensure the subfloor is level. You can use a self-leveling compound to fill in any low spots or dips in the subfloor. Here's a step-by-step guide:
- Clean the Subfloor: Remove any dirt, debris, or old adhesive from the subfloor to ensure proper adhesion of the self-leveling compound.
- Mix the Self-Leveling Compound: Follow the manufacturer's instructions to mix the self-leveling compound. Use a drill with a mixing paddle to ensure a smooth and consistent mixture.
- Pour and Spread the Compound: Pour the self-leveling compound onto the subfloor and use a trowel or a gauge rake to spread it evenly. Work quickly as the compound will start to set within a short period.
- Allow the Compound to Dry: Let the self-leveling compound dry completely according to the manufacturer's instructions. This may take several hours or overnight.
2. Adjust Tile Spacing
If the unevenness is due to improper tile spacing, you can adjust the spacing between the tiles. Use tile spacers to ensure consistent spacing between the tiles. Here's how:
- Remove the Tiles: Carefully remove the tiles that are causing the unevenness. Be careful not to damage the tiles or the surrounding area.
- Clean the Mortar: Remove any excess mortar from the back of the tiles and the subfloor.
- Reinstall the Tiles with Spacers: Place the tiles back on the subfloor, using tile spacers to maintain the correct spacing. Press the tiles firmly into the mortar to ensure proper adhesion.
- Check for Levelness: Use a level to check the levelness of the tiles. Make any necessary adjustments by adding or removing mortar as needed.
3. Reapply Mortar
If the unevenness is caused by poor mortar application, you can reapply the mortar to ensure proper adhesion. Here's what you need to do:
- Remove the Tiles: Gently remove the tiles that are not adhering properly.
- Clean the Mortar: Remove any old mortar from the back of the tiles and the subfloor.
- Apply New Mortar: Use a notched trowel to apply a fresh layer of mortar to the subfloor. Make sure the mortar is spread evenly and has a consistent thickness.
- Reinstall the Tiles: Place the tiles back on the subfloor, pressing them firmly into the mortar. Use a level to check the levelness of the tiles and make any necessary adjustments.
4. Replace Damaged Tiles
If the unevenness is due to damaged or low-quality tiles, you may need to replace them. As a supplier, I offer a wide range of high-quality glazed polished tiles, including Black Ceramic Tile, Grey Luxury Glazed Ceramic Tiles, and Marble Porcelain Tiles, that are less likely to cause installation issues. Here's how to replace the damaged tiles:
- Remove the Damaged Tiles: Use a chisel and a hammer to carefully remove the damaged tiles. Be careful not to damage the surrounding tiles or the subfloor.
- Clean the Mortar: Remove any excess mortar from the back of the tiles and the subfloor.
- Install the New Tiles: Apply a fresh layer of mortar to the subfloor and place the new tiles on top. Press the tiles firmly into the mortar and use a level to check the levelness.
- Grout the Tiles: Once the tiles are installed and leveled, apply grout to fill the gaps between the tiles. Use a grout float to spread the grout evenly and remove any excess.
Preventive Measures for Future Installations
To avoid uneven tile installation in future projects, here are some preventive measures you can take:
- Choose High-Quality Tiles: As a supplier, I recommend choosing high-quality glazed polished tiles that have consistent thickness and flatness. Our Black Ceramic Tile, Grey Luxury Glazed Ceramic Tiles, and Marble Porcelain Tiles are carefully selected to meet the highest quality standards.
- Prepare the Subfloor Properly: Ensure the subfloor is clean, level, and dry before installing the tiles. Use a self-leveling compound to correct any unevenness in the subfloor.
- Use the Right Tools and Materials: Use the appropriate tools and materials for the tile installation, including a notched trowel, tile spacers, and a level. Follow the manufacturer's instructions for mixing and applying the mortar.
- Hire a Professional Installer: If you're not experienced in tile installation, it's best to hire a professional installer. A professional installer has the skills and expertise to ensure a flawless installation.
Conclusion
Dealing with uneven glazed polished tile installation can be a challenging task, but with the right strategies and preventive measures, you can achieve a beautiful and level tile surface. As a supplier of high-quality glazed polished tiles, I'm committed to providing you with the best products and support to ensure your project's success. If you have any questions or need assistance with your tile installation, please don't hesitate to contact me for more information and to discuss your procurement needs. I look forward to working with you on your next project.

References
- Tile Council of North America. (n.d.). Tile Installation Handbook. Retrieved from [Website URL]
- Ceramic Tile Institute of America. (n.d.). Installation Guidelines. Retrieved from [Website URL]