

How to install Marble Golden Tile on a sloped surface?
Jul 02, 2025
Leave a message
Installing marble golden tiles on a sloped surface can be a challenging yet rewarding project. As a trusted supplier of Marble Golden Tile, I'm here to guide you through the entire process, ensuring a successful and stunning installation.
Understanding the Basics of Marble Golden Tiles
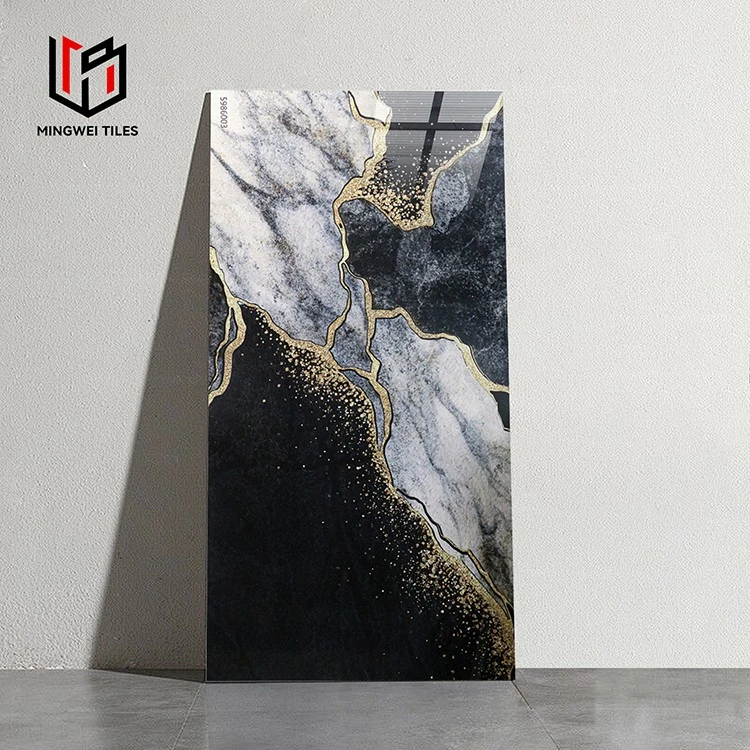
Before we dive into the installation process, let's take a moment to understand what makes marble golden tiles so special. Our marble golden tiles, such as the Colorful Glazed Polished Gold Tiles, Brick Surface Glossy Golden Tiles, and Black Gold Tiles, are crafted with precision and attention to detail. They offer a luxurious and elegant look that can transform any space, whether it's a residential bathroom or a commercial lobby.
These tiles are not only beautiful but also durable. Made from high - quality marble materials, they can withstand daily wear and tear, making them a great long - term investment for your project. The golden finish adds a touch of opulence and can enhance the overall aesthetic of the sloped surface where they are installed.
Pre - installation Preparations
Surface Inspection
The first step in installing marble golden tiles on a sloped surface is to thoroughly inspect the surface. Check for any cracks, unevenness, or loose materials. The surface should be clean, dry, and structurally sound. If there are any cracks, you may need to repair them using a suitable patching compound. For uneven surfaces, you can use a self - leveling compound to create a smooth base.
Measuring the Area
Accurately measure the sloped surface to determine the amount of tile you need. Measure the length, width, and height of the slope, and calculate the total square footage. It's always a good idea to add an extra 10 - 15% to your tile order to account for cuts, waste, and any future repairs.
Gathering Tools and Materials
You'll need a variety of tools and materials for the installation. Here's a list of what you'll typically need:
- Tiles: Of course, you'll need your marble golden tiles. Make sure they are of the right size and style for your project.
- Tile Adhesive: Choose a high - quality tile adhesive that is suitable for use on sloped surfaces. It should have good bonding strength and be able to hold the tiles in place on the slope.
- Trowel: Different sizes of trowels are used for applying the adhesive. A notched trowel is commonly used to create ridges in the adhesive for better tile adhesion.
- Tile Cutter: Depending on the complexity of the cuts, you may need a manual tile cutter, a wet saw, or a tile nipper. A wet saw is ideal for making straight and accurate cuts on marble tiles.
- Grout: Select a grout that complements the color of your marble golden tiles. There are different types of grout, such as sanded and unsanded. Sanded grout is usually better for larger tile joints, while unsanded grout is suitable for smaller joints.
- Spacers: These are used to ensure even spacing between the tiles during installation.
- Level: A spirit level or a laser level is essential to ensure that the tiles are installed straight and level on the sloped surface.
Installation Process
Applying the Adhesive
Start by applying the tile adhesive to the sloped surface using the notched trowel. Begin at the bottom of the slope and work your way up. Spread the adhesive in small sections at a time, as it can dry quickly. Use the notched side of the trowel to create ridges in the adhesive. The size of the notches on the trowel will depend on the size of the tiles. Generally, larger tiles require larger notches.
Setting the Tiles
Once the adhesive is applied, start placing the marble golden tiles on the slope. Press each tile firmly into the adhesive, making sure it is level. Use spacers between the tiles to maintain consistent spacing. Work in small areas, and check the level of the tiles frequently as you go. If the tiles are not level, you can adjust them by gently tapping them with a rubber mallet.
Cutting the Tiles
As you reach the edges and corners of the sloped surface, you'll likely need to cut the tiles to fit. Measure the area where the cut tile is needed, mark the tile accordingly, and use your tile cutter to make the cut. When cutting the tiles on a slope, it's important to be extra careful to ensure accurate cuts.
Working Up the Slope
Continue installing the tiles row by row, working your way up the slope. As you move up, make sure to support the tiles to prevent them from sliding down before the adhesive sets. You can use temporary supports such as wooden braces or brackets if necessary.
Post - installation Steps
Grouting
After the tile adhesive has dried (usually within 24 - 48 hours), it's time to grout the tiles. Mix the grout according to the manufacturer's instructions. Use a grout float to apply the grout to the tile joints at a 45 - degree angle. Make sure to fill all the joints completely. Then, use a damp sponge to wipe off the excess grout from the tile surface. Rinse the sponge frequently to avoid leaving grout residue on the tiles.

Sealing the Tiles
Once the grout has dried (usually after 24 - 48 hours), it's recommended to seal the marble golden tiles. Sealing helps to protect the tiles from stains, moisture, and dirt. Apply the sealer according to the product instructions, using a brush or a roller. Make sure to cover the entire tile surface and the grout lines.
Tips for a Successful Installation
- Take Your Time: Installing marble golden tiles on a sloped surface is a meticulous process. Don't rush through it. Take your time to ensure accurate cuts, proper adhesion, and even spacing.
- Safety First: Wear appropriate safety gear, such as safety glasses, gloves, and a dust mask, especially when using power tools like a wet saw.
- Test the Adhesive: Before starting the full installation, test the tile adhesive on a small area of the sloped surface to make sure it adheres well and doesn't cause any discoloration or damage to the tiles.
Contact for Procurement
If you're interested in purchasing our high - quality marble golden tiles for your sloped surface project, we'd love to hear from you. Our team of experts can provide you with detailed information about our products, help you choose the right tiles for your needs, and offer support throughout the installation process. Whether you're a contractor, a designer, or a homeowner, we have the right solutions for you.
References
- "Tile Installation Handbook" by Tile Council of North America.
- "Marble and Stone: A Comprehensive Guide" by Stone Industry Association.